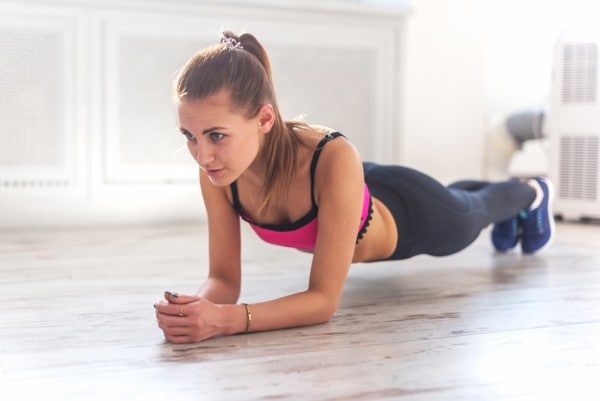
The core of your physique contains a few muscle groups. The group of ab, glute, hip and lower back muscles all cooperate in giving your upper body power during a run. These groups of muscles stop your body from using energy needlessly, help keep your body safe from various injury, and provide that pep in your running movements.
A very good and efficient way of shoring up core muscles is through the
plank.
Proper Form
Proper form and technique is as important to planking as planking itself. That means without proper form and technique, planking is virtually a waste of time. And without proper form and technique, the risk of injury is considerably higher.
Here some of the more important things to remember when attempt to do
the different kinds of planks.
Squeeze the muscles of your butt to make your lower body more stable.
Do not lock the knees. Bend each knee a little.
Do not collapse the lower back.
Try contracting the back of your shoulders to cause your shoulders to be in
the same angle as your upper body.
Try keeping your abs tight by squeezing your belly inward.
Try lengthening your spine by trying to lift your head from the rest of your body.
Keep the distance of one foot from the other by aligning each foot with the
hip. Do this unless the plank variation requires a different position.
If you find planking difficult at first, you can perform it with each knee touching the ground.
Planking can be done whenever and wherever you want, as long as it’s safe and it doesn’t cause anyone any inconvenience. You have all the reason in the world to do these exercises. They are time-friendly and very efficient when it comes to working your core. They can also aid in boosting your running performance like never before.
Check out the 7 different ways of planking which you can incorporate into your routines.
Original Planking
Try lying down as you face the ground. Put each hand (palms-down) right below each shoulder. Prop yourself on each forearm and lift the hips. Try keeping the head, back and legs in a flat angle. Also try keeping the neck from straining at a relaxed and neutral pose by staring at the floor. There should be a foot of space between the level of your head and
the level of each hand.
Original Planking with One Leg off the Ground
You should first be in the original planking pose as instructed above. Gradually lift a leg around half-a-foot from the ground. Hold that pose for 2 seconds then lower the leg. You should be doing the original plank again. Repeat this with the other foot.
Planking with 2 Points
Start once more with the original planking pose as instructed above. Lift an arm and the opposite leg at the same time. Try keeping your abs contracted and tightly wound. Try keeping the level of the back and shoulders parallel to the ground. Do not twist. This variation is good for the muscle group that surrounds the spinal column.
Up ’n’ Down Planking
Again, start in the basic planking pose as instructed above. Try to keep the arms straight as you push off the ground. Do not lock your arms. Gradually try lowering your upper body to one side (just above the forearm), while bending the other arm a bit. Repeat this movement on the other side.
Rocking and Planking
Start in the basic planking pose as instructed above. Try slowly rocking backwards and forwards by letting the head move to and from the hands. The more distance you try rocking your body, the more difficult the workout.
Spiderman Planking
Start in the basic planking pose as instructed above. Bring your right knee up as close to the right elbow as possible. Do not twist or move your upper body, and do not allow your foot to make contact with the ground as you bring it up and straighten it back down. Repeat this movement with the other leg.
Side planking and twisting
Try lying on your side as you straighten out each knee. Prop yourself up on the elbow and forearm. Try lifting the hips. Your body should be in a straight line from the head to the feet. Raise a hand and try to reach the ceiling. Try bringing the hand down, below the chest as you twist the torso. Try reaching behind you. Stay in this position for a few seconds. Go back to the position you started out in. Repeat this movement with the other side.
